Jul 11, 2011

Adding Custom Markers Open layers and Geocoder in Drupal : Part 2

 Part 1
Introduction
This is an area which covers to add ‘Custom markers’ or ‘Multiple Custom markers’ to yourGeo map. This chapter assumes that you have a fair understanding about the Part1 which is in the above link.

  • Now your map is created and then you see  the default marker (ornage/blue ring) sticked in the Address you added.
  • now we need to change the marker


Step by Step

  • Site building --> Openlayers--> Styles or /admin/build/openlayers/styles
    • All the markers will be listed, Clone the ‘Default style’ marker.
      • Fill all the fields with your new markers name and description
      • Under Style Properties and Plugins--> externalGraphic give the URL of your marker
      • then to define the size of the marker size click on pointRadius and adjust then adjust the numeric value in textbox
      • Save the Style;
      • Your marker will be displayed in the list


  • Now you need to select the custom marker for your map
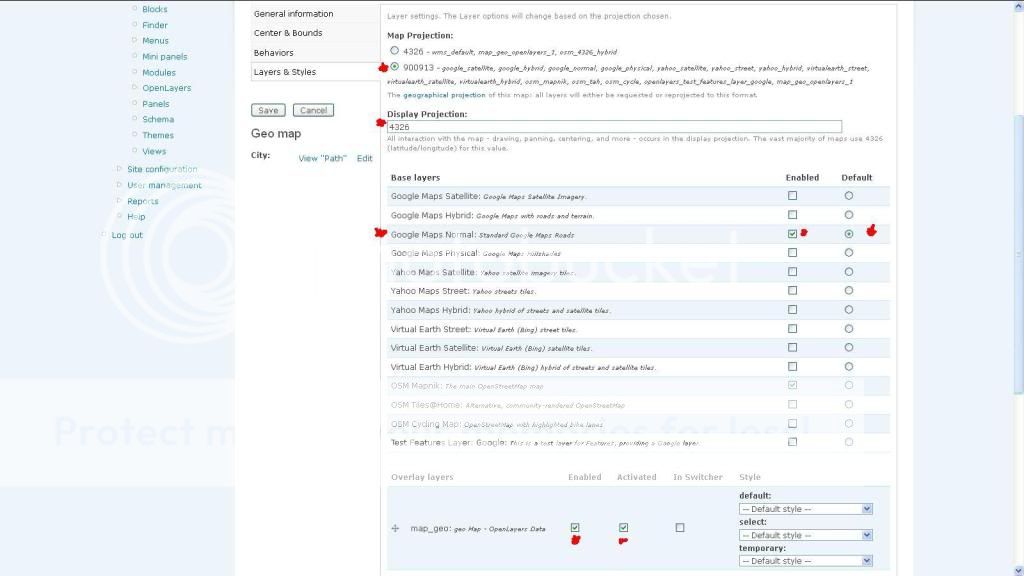
    • Go-to the Preset you’ve created already
    • Select Layers & Styles tab
    • Scroll down to see your ‘View’  you’ve activated and enabled in ‘Overlay layers’
    • Select the marker/ style you created from the dropdown list in ‘Style’ column
    • Select in all three Dropdown  list
    • And hit Save.
  • Refresh your map-page and you’ll get your newly created markers

Jul 7, 2011

Integrating Open layers and Geocoder in Drupal

Integrating Open layers and Geocoder in Drupal
Required Modules:


  • Enable all the required modules
  • Add a content type     eg : ‘Geo Map’
    • Create a field on the Content type by clicking on ‘Managing Fields
      • Select the ‘ Openlayers WKT’ as your type data to store.
      • and ‘Openlayers Geocoder’ Form element type.
      • Save the content type


  • Now lets create preset
    • Go to admin/build/openlayers/presets/
      • Clone one of the existing preset ‘eg : Default’
      • Rename the fields as you want
      • and save the preset
      • Now you should find your newly created preset in the admin/build/openlayers/presets/ list.
    • Click edit on your preset
    • Save your preset

Re-check whether you have selected the correct map preset in /admin/build/openlayers - Openlayers Default Preset, and Click ‘Save Configurations’.
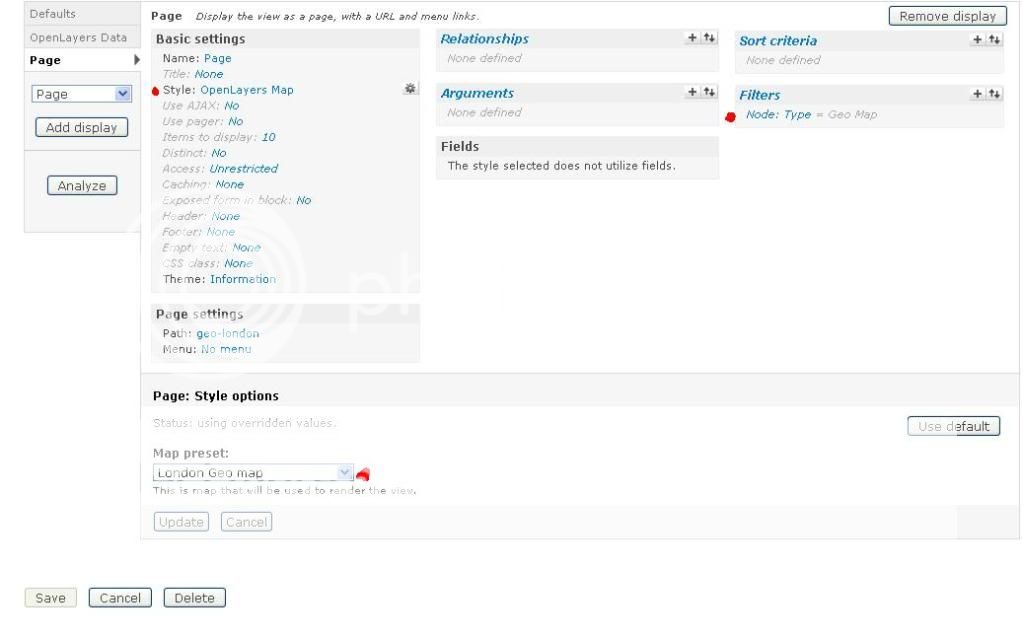
  • Now go back to our created ‘View’
    • Add a ‘Page’ display
    • In Basic settings
    • Change the style options into ‘OpenLayers Map’
    • and click ‘override’ and then ‘update’


  • We are almost done with our configurations


  • Next lets create a ‘Content’
    • The content type is supposed to be the content type you created above.
    • And you’ll see your map appearing
    • select a location in the map
    • or type location in the ‘Search address’ autocomplete field
    • and click Save.


Demo

Jun 17, 2011

Intro to Module Development

Learn to customize and extend Drupal's features and functionality.
This video is ginormous! yet it gives you a perfect understanding about Drupal Module Development. Ill be coming up with 'step by step' written instructions very soon, for now  enjoy this video with a cup of tea ;)


Reference from Drupal

Introduction to Drupal

Drupal is open source software maintained and developed by a community of hundreds of thousands of users and developers. It's distributed under the terms of the GNU General Public License (or "GPL"), which means anyone is free to download it, share it with others, and contribute back to the project.

This open development model means that people are constantly working to make sure Drupal is a cutting-edge platform that supports the latest technologies that the Web has to offer.