Integrating Open layers and Geocoder in Drupal
Required Modules: - Openlayers : http://drupal.org/project/openlayers
- Openlayers geocoder : http://drupal.org/project/openlayers_geocoder
- Views : http://drupal.org/project/views
- Enable all the required modules
- Add a content type eg : ‘Geo Map’
- Create a field on the Content type by clicking on ‘Managing Fields
- Select the ‘ Openlayers WKT’ as your type data to store.
- and ‘Openlayers Geocoder’ Form element type.
- Save the content type
- Create a View : admin/build/views/
- Add a ‘Openlayers Data’ display type
- Add fields :
- Node:title
- Node:teaser
- Content : OpenLayers WKT
- in this field select label ‘none’
- and Format ‘WKT value’
- Filter it by:
- Node type : Geo Map
- Node published: Yes
- Save the view
- View screenshot http://i709.photobucket.com/albums/ww94/ashkarrahman/Openlayers/figure05.jpg
- Now lets create preset
- Go to admin/build/openlayers/presets/
- Clone one of the existing preset ‘eg : Default’
- Rename the fields as you want
- and save the preset
- Now you should find your newly created preset in the admin/build/openlayers/presets/ list.
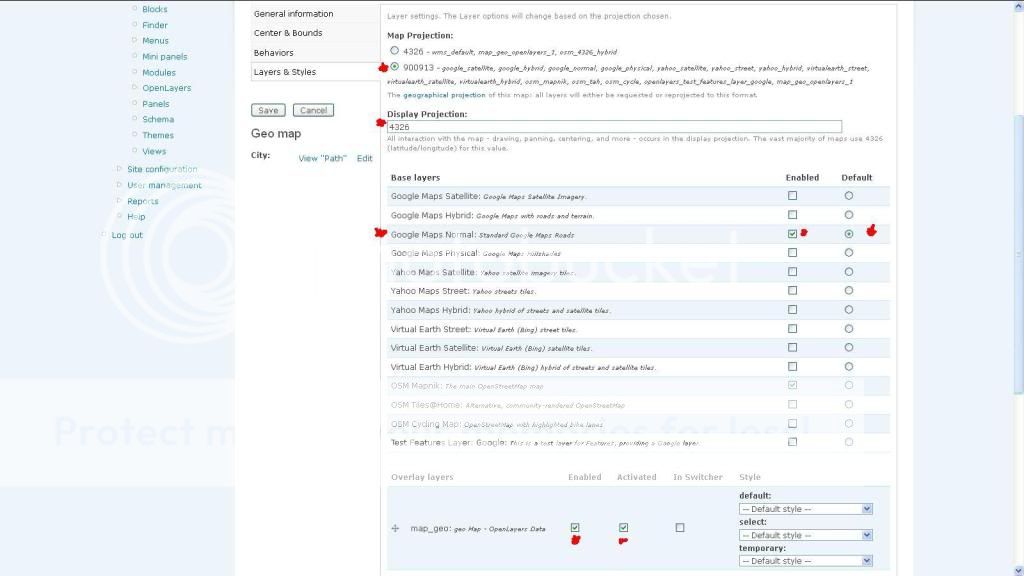
- Click edit on your preset
- Click the ‘Layers &; Styles’ tab
- Select ‘Map Projection’ 900913
- Display Projection: 4326
- Base layers : Google Maps Normal [Enabled and Default]
- Overlay layers : Enable and Activiate the ‘view’ you created/
- View Screenshot http://i709.photobucket.com/albums/ww94/ashkarrahman/Openlayers/figure02.jpg
- Beahviours is the tab where you can enable popus for the points you add
- The ‘General Information’ tab contains the info about your preset
- The map ‘width’ and ‘height’ could be Adjusted here
- The ‘Center & Bounds’ tab shows where the map will center itself initially.
- Save your preset
Re-check
whether you have selected the correct map preset in
/admin/build/openlayers - Openlayers Default Preset, and Click ‘Save
Configurations’.
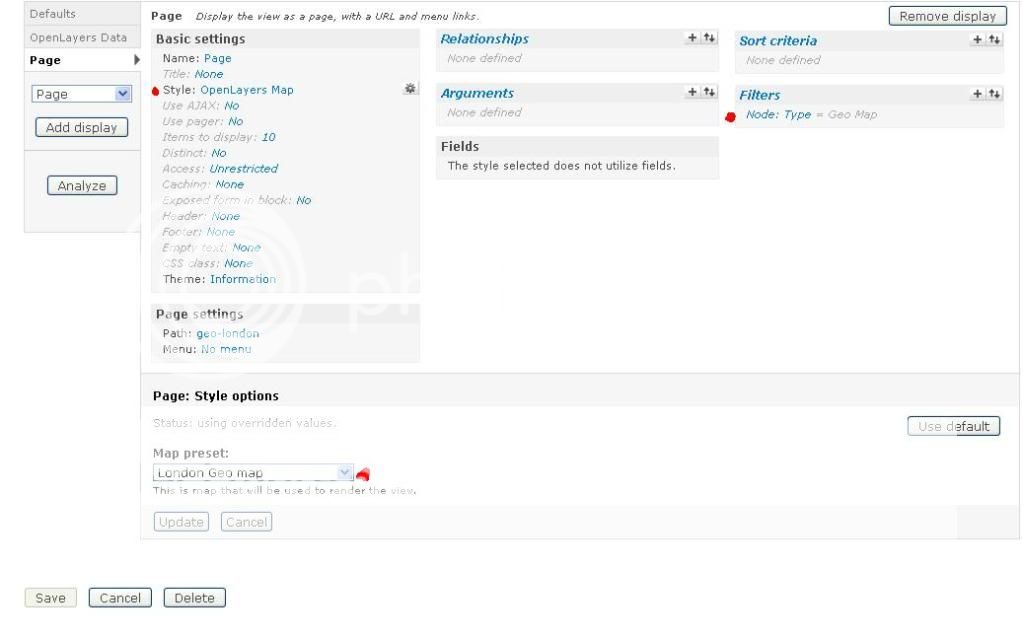
- Now go back to our created ‘View’
- Add a ‘Page’ display
- In Basic settings
- Change the style options into ‘OpenLayers Map’
- and click ‘override’ and then ‘update’
- Click the gear icon next to ‘OpenLayers Map’ in styles (Basic settings) and select the Map preset you Created above.
- Override and Update
- Give a path in the ‘Page settings’ below ‘Basic settings’ block eg:map
- Save your ‘View’
- View Screenshot http://i709.photobucket.com/albums/ww94/ashkarrahman/Openlayers/figure04.jpg
- We are almost done with our configurations
- Next lets create a ‘Content’
- The content type is supposed to be the content type you created above.
- And you’ll see your map appearing
- select a location in the map
- or type location in the ‘Search address’ autocomplete field
- and click Save.
- Voila !!!!!
- To view all the locations in one map, go to the path you added in the view eg: http://sitename/path-in-view
- Enjoy and have fun...
- See you in Part2 of the same chapter ‘Adding Custom Multiple Markers’
Demo